
Feature Image Photo Credit Cedar & Sagebrush
Buying an arrow saw is easy but mountain hunting is an expensive obsession. Building your own DIY arrow saw is fairly easy to do with minimal equipment and expense. If you’re a dedicated archer why not save some hard earned money, drink a couple of beers and build your own?!
Materials:
Scrap Wood or Plywood (free)
Screws ($1)
Sharpie ($0.80)
Router (electric or pneumatic ) ($40 – $200)
Router disks ($4)
At the low end you can put a fully functional arrow saw together for under $46…you’re welcome. My fancy ass Apple Archery saw cost me over $500 and this is the one I find myself using more often than not. Lesson learned.
Here’s how one of my good hunting buddies and I built our own.
Step 1:
First thing you are going to want to do is get your tools ready. Just like the material you do not need anything fancy. A table saw was used to break down our material but you could use a skill saw, or even a hand saw if you’re Amish or want to burn a few extra calories over the winter. You’re also going to need an impact drill or screwdriver, and a tape measure.
To build this we used scrap wood found around the garage, but plywood would be perfectly suitable as well.
Step 2:
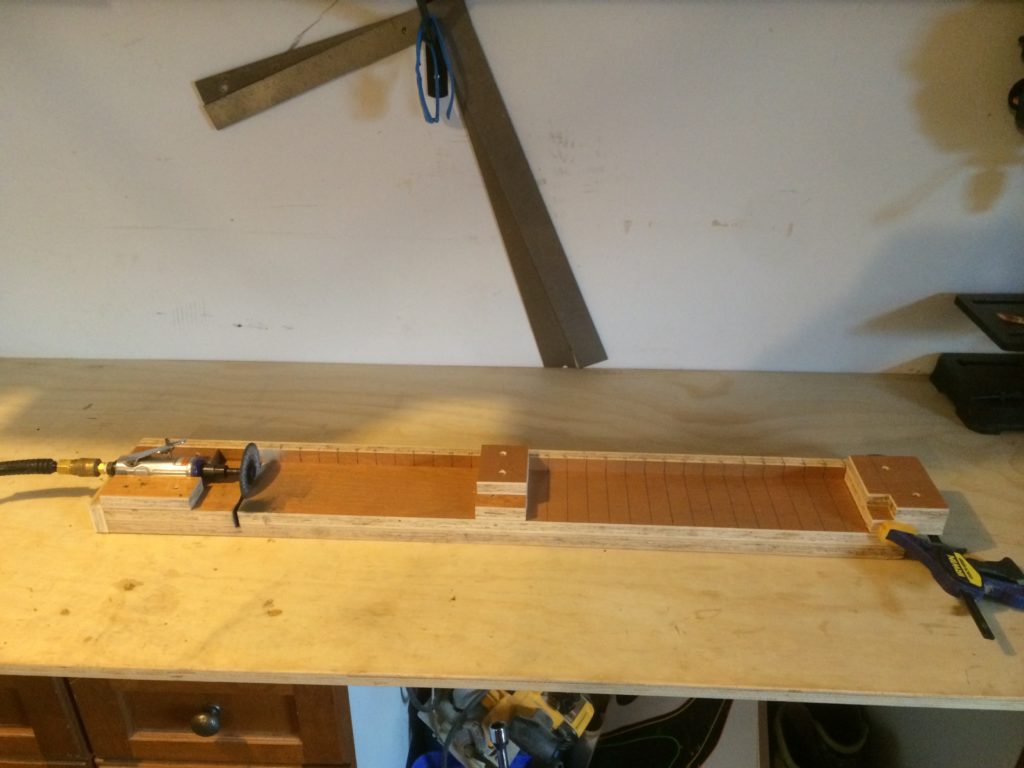
Cutting your material. We took a scrap piece and cut it around 38″ and then ripped it down to 4″ across the length. Your cuts can be varied to suit your draw length.
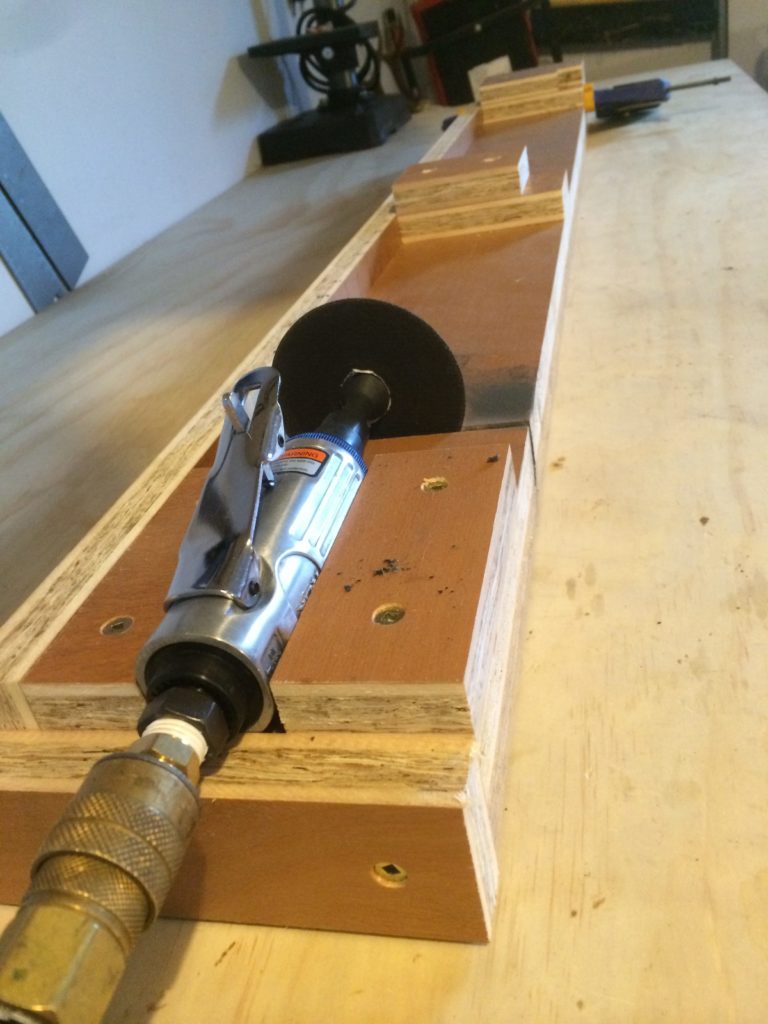
Then we cut two pieces 4″ and ripped them down to 1 3/4″. We determined this measurement by how our router would fit in between the blocks sitting on the base.
We also capped the end with another 4″ piece, so the router would sit flush to the end. We left enough space for the male adapter to rest on it.
We then cut a blade’s width (1/8″) into our base so the router disk had room to sit. Be sure to set your depth on the skill saw or table saw to give you enough space for the disk.
[column size=one_half position=first ]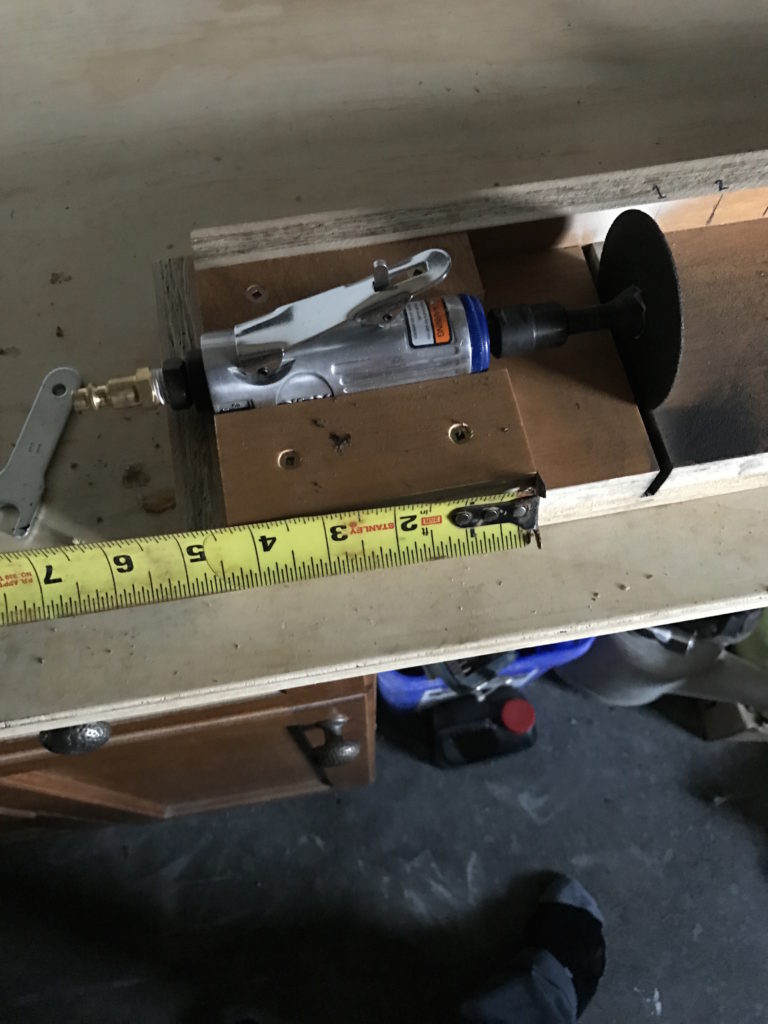

We then added a ledge along the length of the entire base that sits flush with our blocks holding our router in place. This is also where we are going to mark down our 1″ measurements for cutting arrows.
We then cut a piece at 4″ x 2 1/2″ and screwed it to our base. You want it to be somewhere around the centre of your arrow length so it doesn’t bow. We then cut a 3″ x 2 1/2″ piece and screwed it to that so our arrow would rest against it. You should measure the distance from your ledge to the router disk and copy that. This way you put tension on your arrow against it and keep a straight cut.
Next we made another block, but this one will be used to set your cut lengths so it will not be fastened down to the base but will be left floating. When cutting use a clamp to secure it at the desired length of arrow. We cut another two blocks at 4″ x 3″ and then notched a 1″ square out of the corner. This is where your knock will rest. Using a square, scribe a line across the top of the block from the back of your notch. This will line up with the measurements on your ledge so you know what length you are cutting at.
All that is left to do is measure back from your router disk and mark all your 1″ increments.
This pretty much sums up a very easy DIY arrow saw. It is a super handy thing to have for the do or die archer. It’ll be so much easier to properly tune your arrows for yourself, instead of letting that guy that knows everything at the pro shop look at a spine chart and cut them once and tell you you’re good to go. It’s a great winter project and it will even get your friends over to shoot more. Best of luck to everyone in the 2017 season!