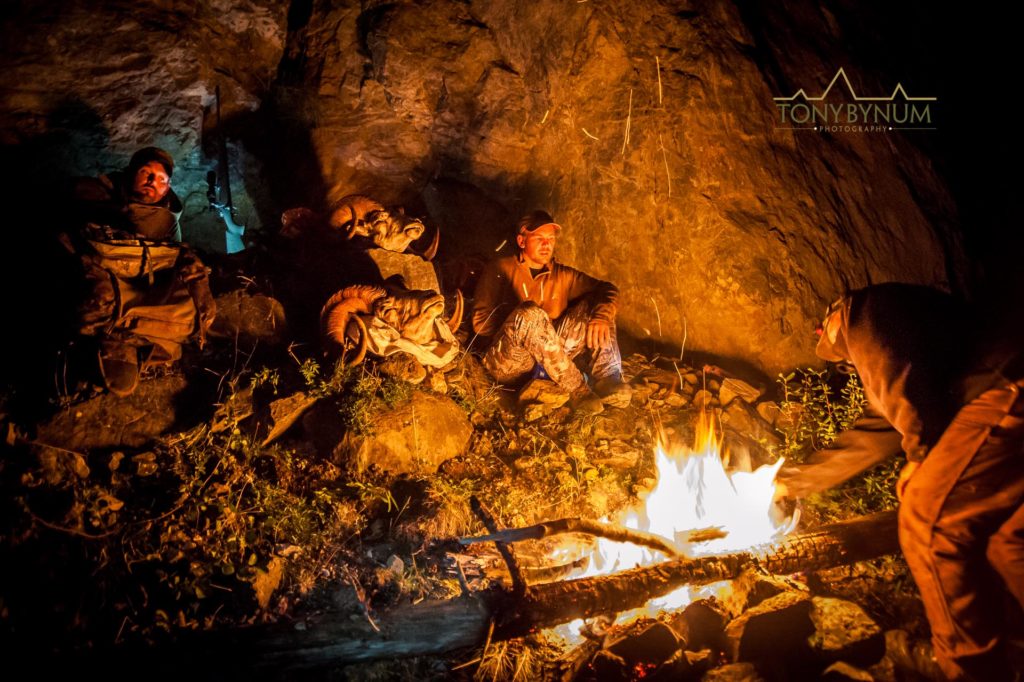
Over the centuries, our hunting stories have been painted and scribed into rocks, shared around campfires with family and friends, written in journals and magazines, and more recently photographed and shared around the world via the Internet. We are visual creatures; from a young age we like to see the world in pictures. Pictures stick with us longer than words, and we’re more likely to remember a photo than a paragraph. Of course today, photographs and the digital age make sharing your story easy.
As a Montana based photographer, capturing hunts is part of my regular yearly routine. I’m hired to take photographs of people’s hunting adventures both here at home in Montana and abroad. I’ve been in a lot of climates and conditions, accompanying hunters chasing many different species. There are a lot of ways to capture “the hunt”. Below I share some tips on how to photograph your next hunting adventure.
To begin, plan to take more than “grip-and-grin” pictures. Try telling your story through your images. There’s no doubt that most of you pack a camera on your hunts in hopes of photographing the “trophy shot”. This year, consider telling a more complete visual story of your hunt. I’m not saying go crazy and strap a GoPro to both your head and your rifle (although it is fun, and you should try it sometime). I’m saying begin taking photographs of the things you see and do while you engage your primary passion, hunting.
Photograph some simple images of things that are often heard about but seldom seen. Get personal. Think about what you do to prepare for the hunt. Include a photo of that knife your grandfather gave you as a kid, or other significant heirlooms or important pieces of your hunting heritage. Show us those remarkable treasures. Take pictures of maps, your notebook, your gun and ammunition, and by all means your friends!
Some other thoughtful photos could include the reloading bench, cleaning your gun, sorting out your gear as it’s spread across the entire man cave or living room, running, exercising, or even your entire trip’s worth of food laid out. Not only will these things make great additions to the hunting story; some might even come in handy for insurance purposes. Photos of guns and gear can be helpful if, heaven forbid, there’s ever a theft or catastrophe.
Next, while you’re in the field, take some photos of the actual trip. Capture simple but essential elements of your adventure. I’ve always liked photos taken while fueling up. Images of the old market or store that’s been there since your grandfather was a kid make great photographs and even better memories. And by all means, if you still have to reset the mechanical pump, and the store owner still lives by the honor system that requires you to actually go in and say hi, document that place and the people that run it!
Other items can include hiking in and setting up camp. You don’t necessarily have to take photos while you’re stalking that trophy buck, bull or ram, but try to document the hunt as much as you’re comfortable with and have time for. Whatever you do, make it fun and show the little details that make hunting so important to us as individuals. So, this year, take the time to be a photographer as much as a hunter. Tell your story with your images!
8 Tips For Capturing Unforgettable Hunting Photographs
First, remember you’re trying to show simple elements. Don’t try to show everything in a photograph. The best way to do this is to get close, so that no one can mistake the subject or emphasis of the photograph. Make the subject a single element.
Second, use a wide aperture, around f 2.0 – or the widest aperture your camera has. A shallow depth of field blurs the background and makes the subject stand out better. This is a simple way to make sure the viewer knows exactly what you’re trying to show them.
Third, photograph some elements that put a person in their environment. Show the weather if you can. Show some background that puts you in your place. You don’t have to show the ridge that will tell everyone on earth the location of your favorite hunting grounds, but a few canyons, some far off trees or meadows, etc., help to add some reality to the photo.
Fourth, make use of early morning and late evening low angle light; both the quality and angle of light are unbeatable. This is the best time to shoot environment and outdoor human interest photos as the light is easy on skin tones, and generally, if you shoot during these periods it’s almost impossible to take a bad photograph.
Fifth, when the sun gets high in the sky, use shadows and trees to shade your subject. Oftentimes you can also get better shots of your gear or a person from a shadowed location.
Sixth, don’t be afraid to turn on the flash, even if it’s sunny out. Most cameras these days will allow you to manually engage the flash, and smarter cameras will read the ambient light (the light that’s around you) and adjust the flash according to how much light it thinks is needed for a proper exposure. This is often referred to as fill flash. Remember, this is a function that most cameras have, but you have to deliberately and manually engage the flash. Some units even allow you to turn the power of the flash up or down – check out your instruction manual.
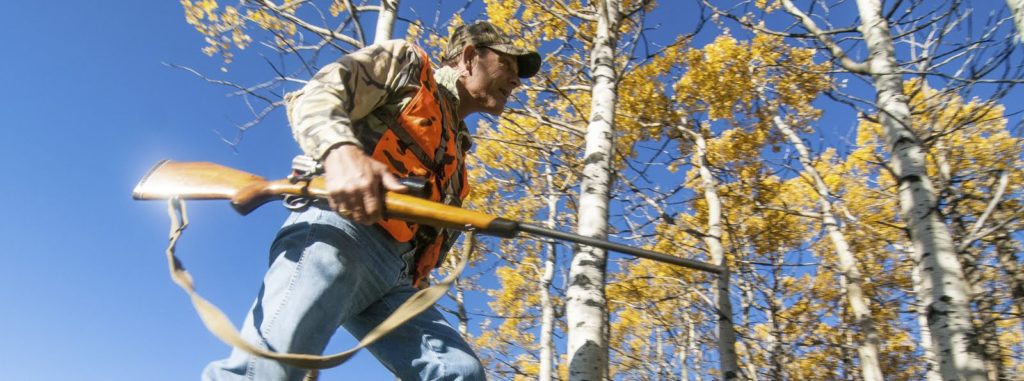
Seventh, use slower shutter speeds like 1/50th or 1/30th of a second to show motion. Often times adding a little motion blur really brings your audience into the image. It evokes your other senses and helps make the story more real. Motion techniques include either holding the camera steady and allowing the subject to blur, or you can move the camera with the motion of the subject, called “panning”, which results in a blurred background and hopefully a sharp subject. This technique requires some practice, but its fun; give it a try.
Eighth, try unique angles. Get low, or below eye level. Sometimes showing an average activity or subject from a new angle changes the way we feel or gives us a new perspective.
Post Production and Sharing
After you have the photos in your camera, the obvious thing is to make prints (if desired) and share the photos. As “old school” as it is, I know a number of people that like to make a printed photo book of each year’s adventures. These are amazing to look at years later! And then of course there are all the digital/online sharing options. If keeping it digital, remember, it’s hard to tell a story with one image so put some thought into the sequence of the shots you share.
I’ve used many sources for book publishing, and right now my top two are Blurb and MyPublisher. I’ve gone back and forth between the two and at this time I’m leaning back towards Blurb because of its simple interface with Adobe Lightroom. I can edit the photos in Lightroom, then plop them into a simple, customizable layout, and send it directly to Blurb, all from within one program.
For slideshows I like to use ProShow. It’s not free, but it’s a great program for making slideshows that you can put on a flash drive, make into screen savers, or share online.
I hope these ideas are helpful in your attempts to preserve lifelong memories this fall. Happy hunting!