In last month’s Roam column, we shared the new boot line-up and classification system recently released by Schnee’s. An approach to boot design that I feel is a major progressive step (I know, I know) forward in helping individuals determine the best boot or boots for their given needs. Boot selection and fitting is both art and science and admittedly a complex topic, and it is for precisely these reasons that I am so excited about how Schnee’s has designed and classified their new boot line-up.
But the question remains, what is the best boot for YOU? Although this article will not necessarily answer that question specifically, it should help you navigate the options available, from any boot manufacturer, and help you ask the right questions in your search for the appropriate boot.
A few weeks ago, I took some time to interview Curt Smith, President of Schnee’s, to dig into his protocols and tips for boot selection and how he would help a customer make an informed decision on the right boot for their hunting needs. So, what you will read in this article is essentially a virtual version of what you would experience if you were to sit down with Curt at the Schnee’s store in downtown Bozeman, MT.
Adam:
When a hunting customer walks in the door, what are the key questions you need answered before you start talking about specific models? Even if they came looking for a specific boot.
Curt:
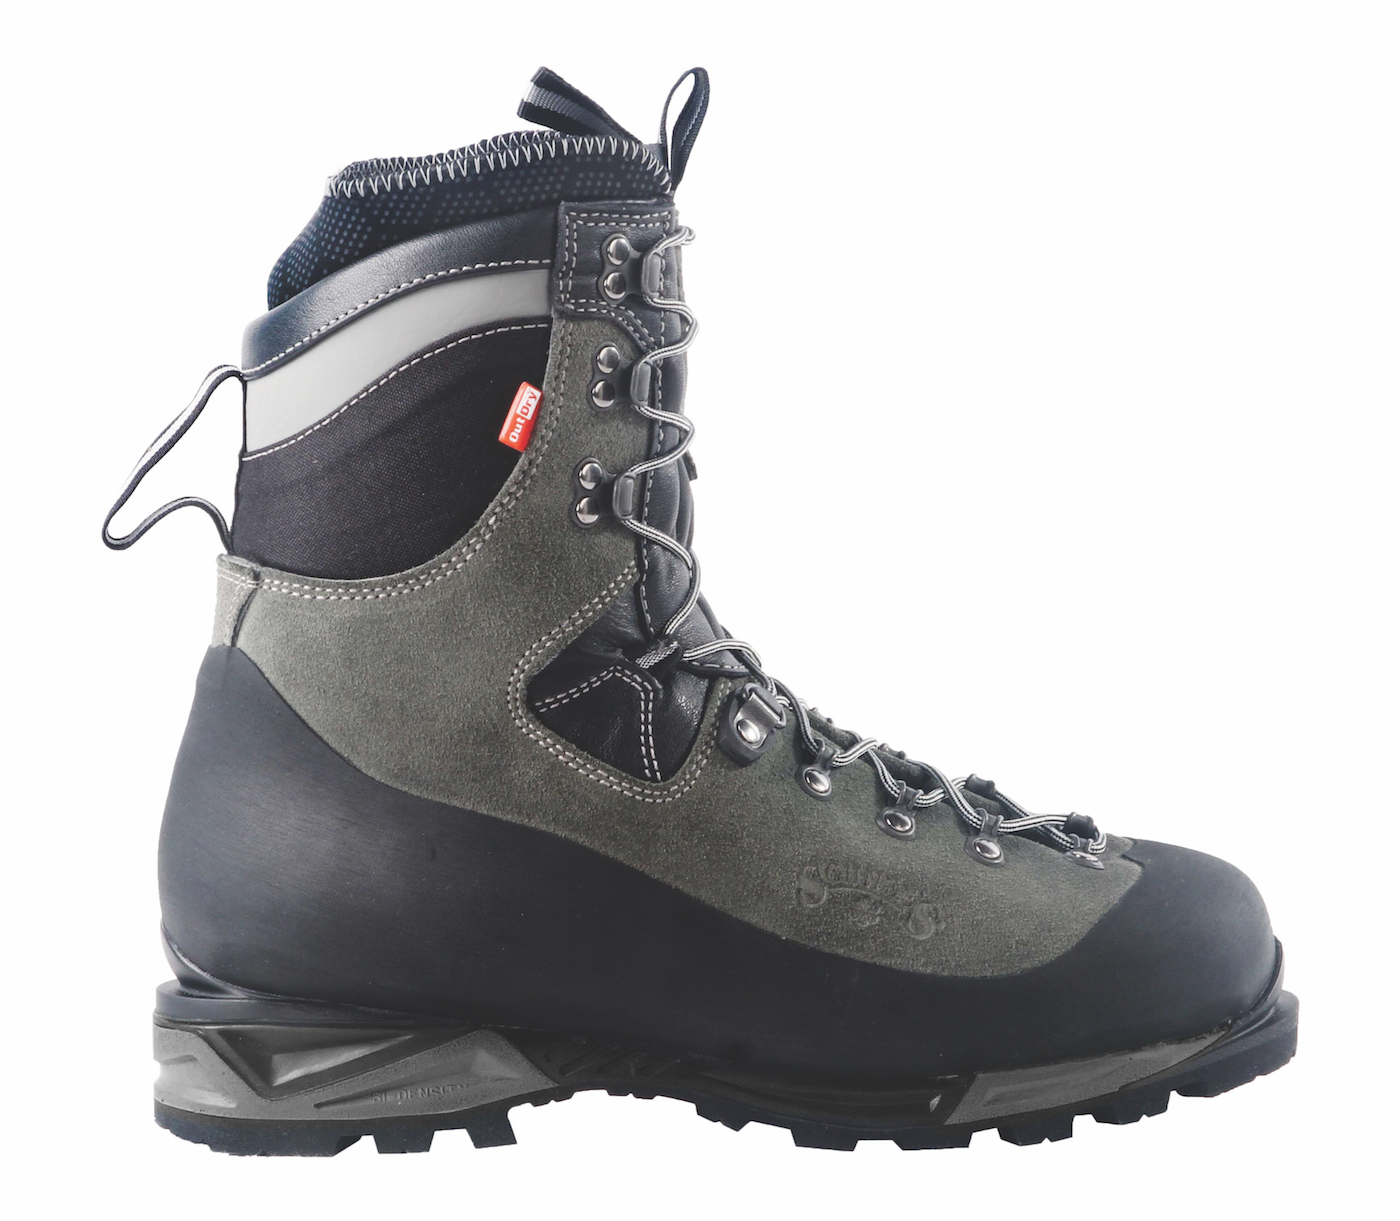
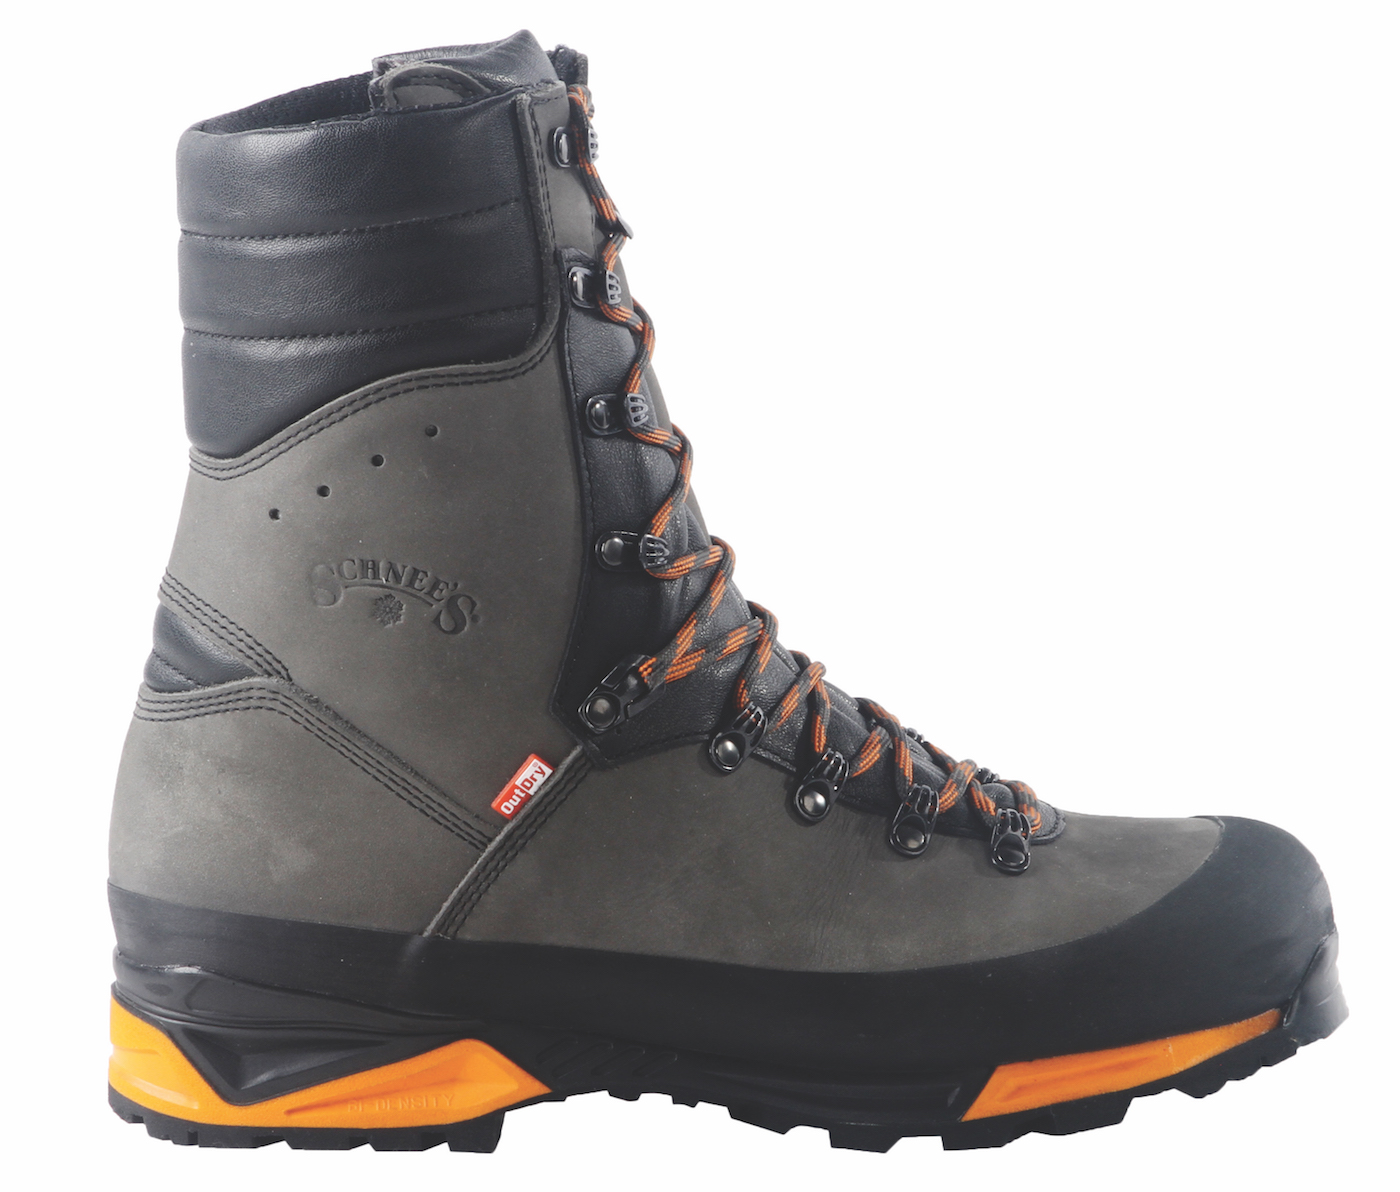
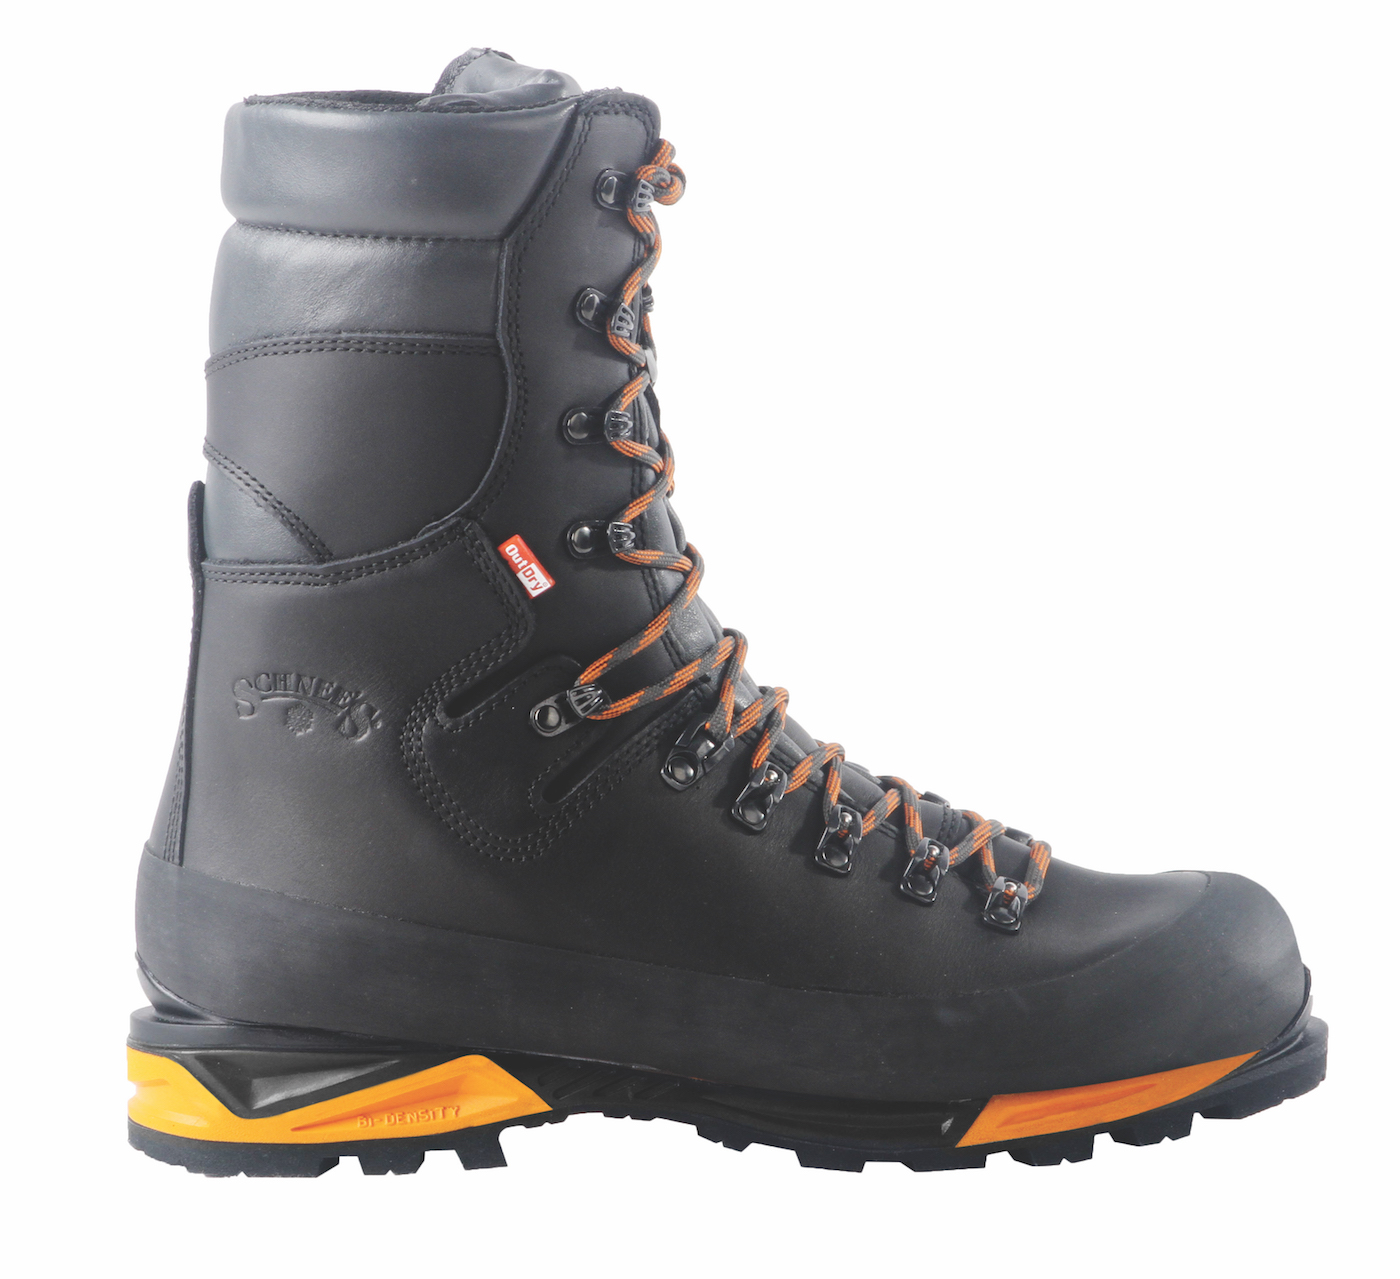
It starts with the species, the time of year they’ll be hunting and the terrain they’ll be hunting in. What and where are they hunting? For example, if a customer comes in looking for a boot for an ibex hunt in Kyrgyzstan or Tajikistan, or an Alaskan Dall sheep hunt, I know that I am going to have them try the new Teton or Granite Pro. The Teton is insulated and rated as a “Flex 4” in our new classification system, so it sits on the high end in terms of stiffness and support. For that sort of environment, it would be a great choice.
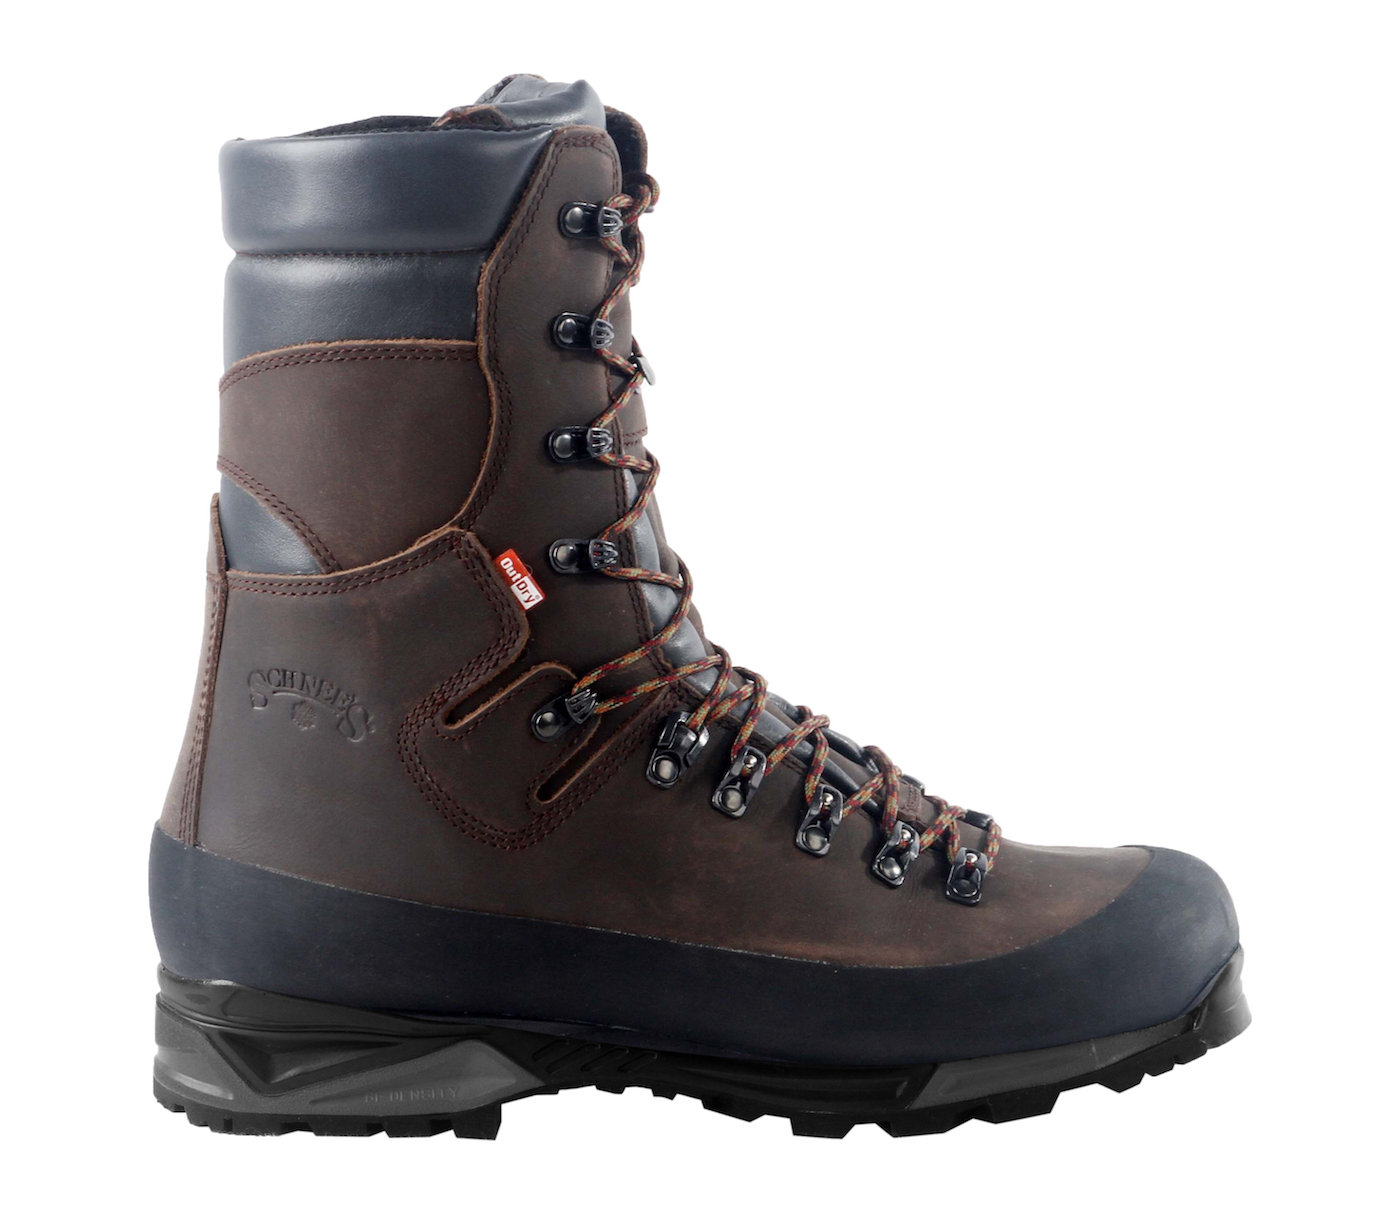
But if we’re talking about, say, a later season boot for elk hunting when the elk are starting to get driven down to lower elevations, something in the “Flex 2” range like the insulated Beartooth II would be more adaptable and versatile for that sort of terrain. Now if that same hunter is a die-hard elk hunter, and hunts from the early season to the late season when they’ll have to climb into the high country in the early fall but then find themselves lower down as the season progresses, a “Flex 3” like the Granite II would be more appropriate.
So, in summary, time of year, species, location (where in the world), and environment are questions that must be answered before we even start talking about specific models.
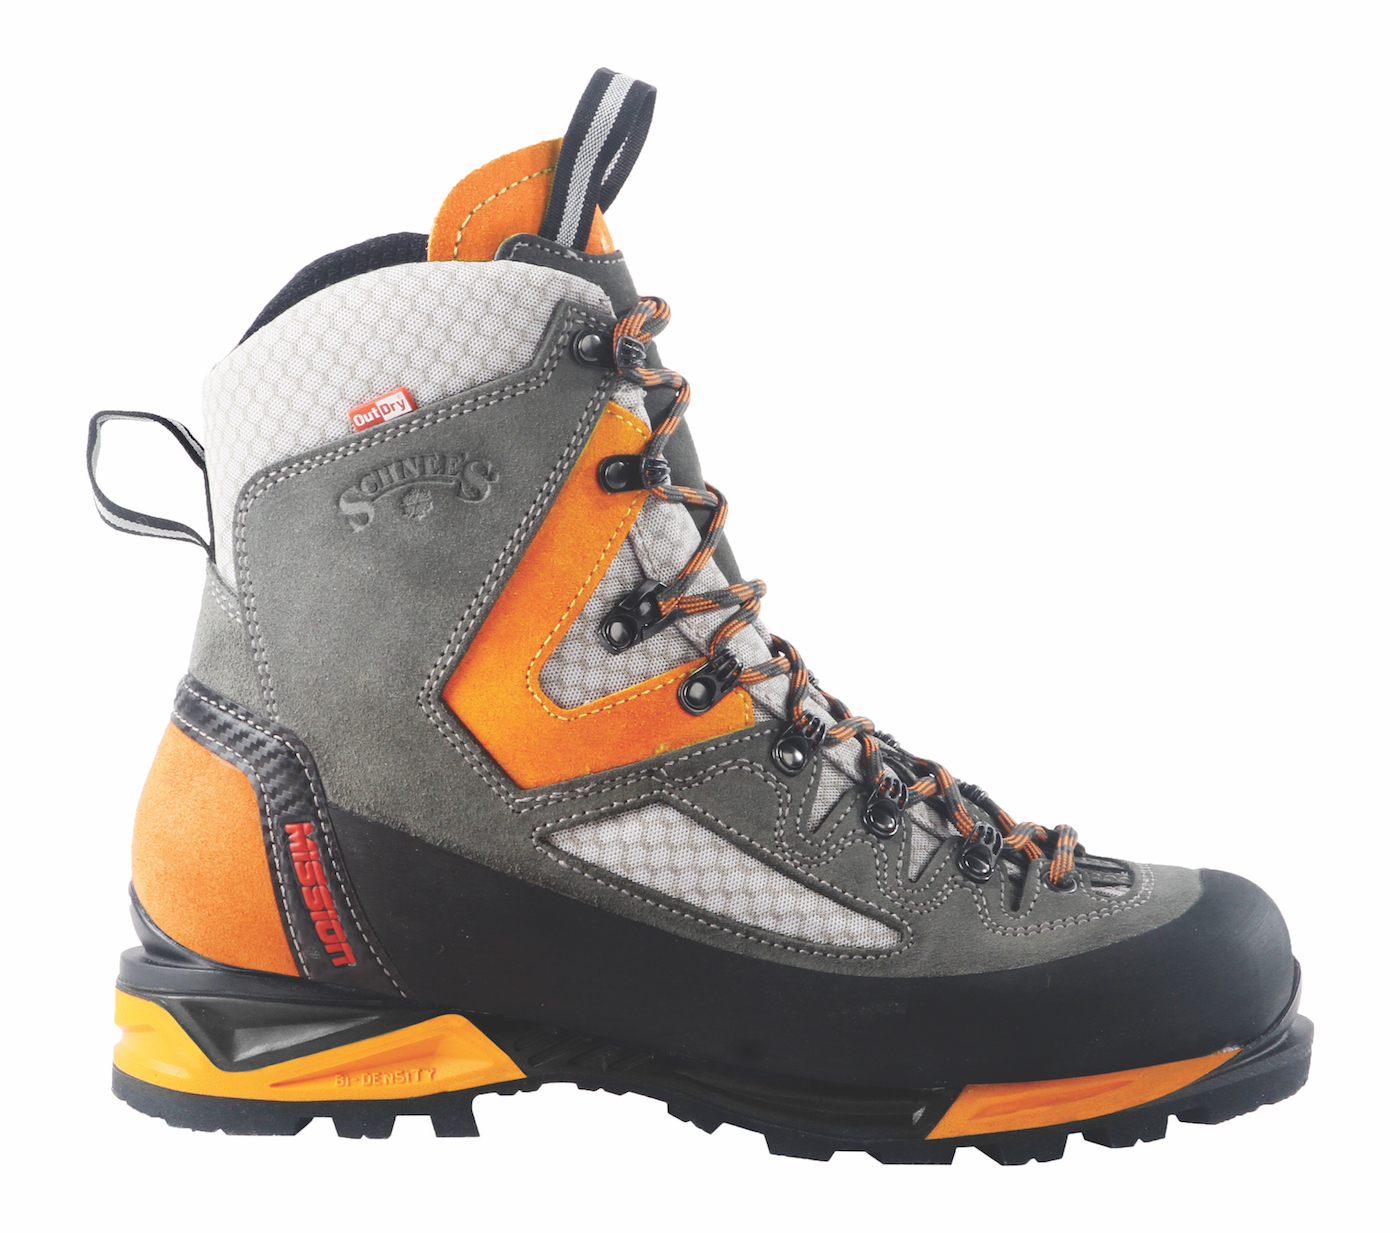
After we’ve answered the “what” and the “where”, we are going to talk about the load or loads they’ll be carrying AND the frame of the person themselves. If I’m talking to a guy that is 130 pounds soaking wet, he is not likely to be comfortable in a Teton or a Mission VT (both “Flex 4” rated boots) even if the species and environments warrant those models. I would advise that person to look at boots in our “Flex 2” and “Flex 3” classes, as those boots will perform more like a 3+ for someone with a smaller, lighter frame. Now, if I get a guy coming in that’s 250 pounds I am going to put him in a “Flex 3” or higher no matter what. There’s a leather thickness difference (in the uppers) between the four flex ratings and of course a stiffness difference and the boots in the “Flex 1” and “Flex 2” classes won’t hold up as well to larger framed hunters. I think many mountain hunters “over-boot” themselves because they think they simply need the stiffest boot they can find, and this is a mistake. Your body frame matters, the loads that you’ll be carrying matters and so does your stride length. It should be mentioned that your stride length will vary depending on the environment (vertical versus flat terrain) and the loads you’re carrying. Let’s say I’ve got a pack that weighs 60 pounds on my back, I might move 2 miles an hour up the trail with that load, versus a daypack weighing 30 pounds when I might be moving 3 – 4 miles an hour up the trail. So, with higher loads my stride is tighter. It’s more like a march with a heavier pack and so a stiffer boot may be warranted if that’s a typical load you’ll be carrying on your hunting trips.
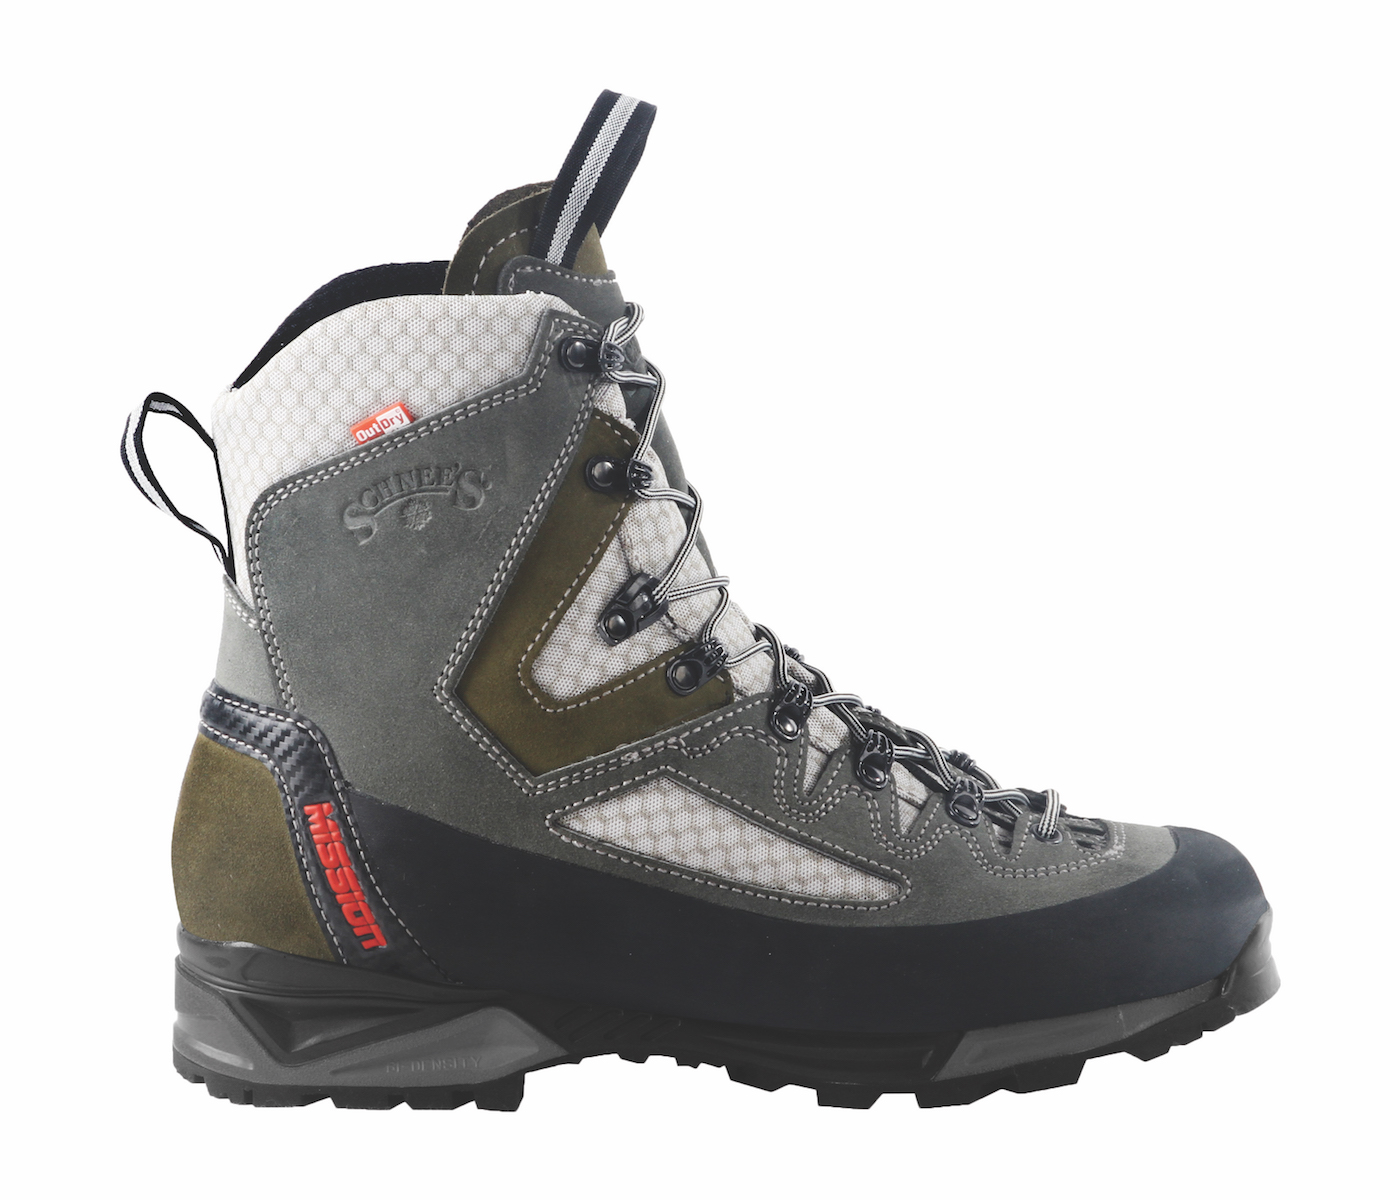
The last question I need answered is, what do they wear the rest of the year? If the customer comes in and tells me they’ve been running around the trails and mountains all summer in trail runners and wears those trail runners for the earliest part of the season, I’m not going to jump up to a “Flex 3” for their mountain boot. I would likely have them try a “Flex 1” like the new Timberline or a lighter weight “Flex 2” like the new Mission. Those boots are going to be lighter, more agile and softer in terms of flex and therefore quieter on the forest floor.
Adam:
What are some of the structural differences, and for that matter similarities, between the four flex ratings? We all understand terms like “stiff” and “supportive” but can you share some specifics as to the actual design elements and materials that separate each class of boot?
Good question, we should talk about that. So, for Schnee’s there is a basic DNA if you will to all our mountain boots and the components that go into our boots. We believe in top quality leather and we believe in randing. In our opinion the importance of randing cannot be overstated. It keeps the foot centered over the top of the boot, for example when side hilling, and this extends the lifetime of the boot significantly. And so, we believe in rands because of the durability and support benefits a good rand provides.
The other DNA integral to all ours boot is the polyurethane midsole. We basically don’t make a boot without a polyurethane midsole. That’s a component we use because it’s the most elite midsole material you can use on a boot and you can fine tune its flex and performance properties via dual density construction, like we’ve done with the bi-density midsole on many of our current boots. That’s always been a component in our boots that we have stuck with. We rarely, if ever, consider anything else for building our midsoles.
The next component we should discuss is our flex plates. In terms of composition, they’re all pretty much the same across the various flex ratings. We use a nylon impregnated plastic. Now, when you get to a “Flex 4” we add a layer of fiberglass to make it more rigid and, in our line-up, the most rigid you can buy. That plate system adds two benefits. It adds protection for the bottom of the foot, and it allows us to fine tune the flex of the boot by integrating that flex plate with the entire chassis of the boot. For instance, with a thinner more flexible outsole like the Vibram Circuma outsole that’s on the Timberline, the flex plate helps protect the feet from rocks and other debris that you might otherwise feel because that outsole is lighter and softer.
Adam:
So, although the flex plates are generally built the same, other than with the “Flex 4”, it’s more how that flex plate is integrated with the entire boot, or chassis as you put it, that determines the flex rating as opposed to using different flex plates in each boot?
Curt:
Yes, precisely. How that flex plate interacts with the midsole, outsole and uppers is what drives the flex rating system. With the uppers for example, each model’s upper is distinctively built and designed for different purposes. This comes back to the “where” and the “what” we discussed at the outset. The weight or thickness of the leather used is one of the ways we differentiate between the various flex ratings. In most of our “Flex 1”, “Flex 2” and “Flex 3” models we use 2.3 millimeter nubuck leather but when you get to the “Flex 3” in the Granite II and Granite VI, or the Granite Pro at “Flex 4” we use a 2.8 millimeter wax impregnated leather. That leather is called Yukon leather, and it’s a real beautiful leather. When you get to the “Flex 4” with the Teton, we use what’s called a “rough out” which is a unique construction. The face of the leather is smooth but it’s got the skin of the hide on it still and that is shown on the outside of the boot. Which is why it’s called “rough out” leather and that’s also a 2.8 millimeter leather. This adds significant abrasion resistance to the exterior of the boot as that side of the hide is the most durable. Again, the boot is purpose built for the most demanding and severe conditions so we made sure we included components that suited these environments.
Now, I wouldn’t say this leather point holds true for all our models. For example, the new Mission and Mission VT are built with a split grain leather and fabric. These boots are built with a light weight upper but a stiff bottom. This is more of a traditional European alpine boot built to be very agile and more appropriate for light and fast ascents. This construction makes the boot very light weight but with excellent edging capabilities. It’s a real precise, almost climbing type boot. So again, an example of a specifically designed boot best suited to a specific purpose.
What I’d like people to understand is that selecting the right boot for the job is a combination of external and internal considerations. On the external side, it’s relatively easy, what are you hunting and where? It’s the internal considerations like your frame and foot needs combined with the actual construction of the boot where people tend to be led astray.
Adam:
Excellent Curt, I know you’ve given our readers plenty to consider in this interview and, I hope, helped them determine the right questions to ask so they can more easily determine the best boot for their specific hunting needs. Thank you for your time.
To see the new Schnee’s line-up and the completely re-built Schnee’s website, go to www.schnees.com.